Showing posts with label projects. Show all posts

Monday, July 31, 2017

Making an Entrance

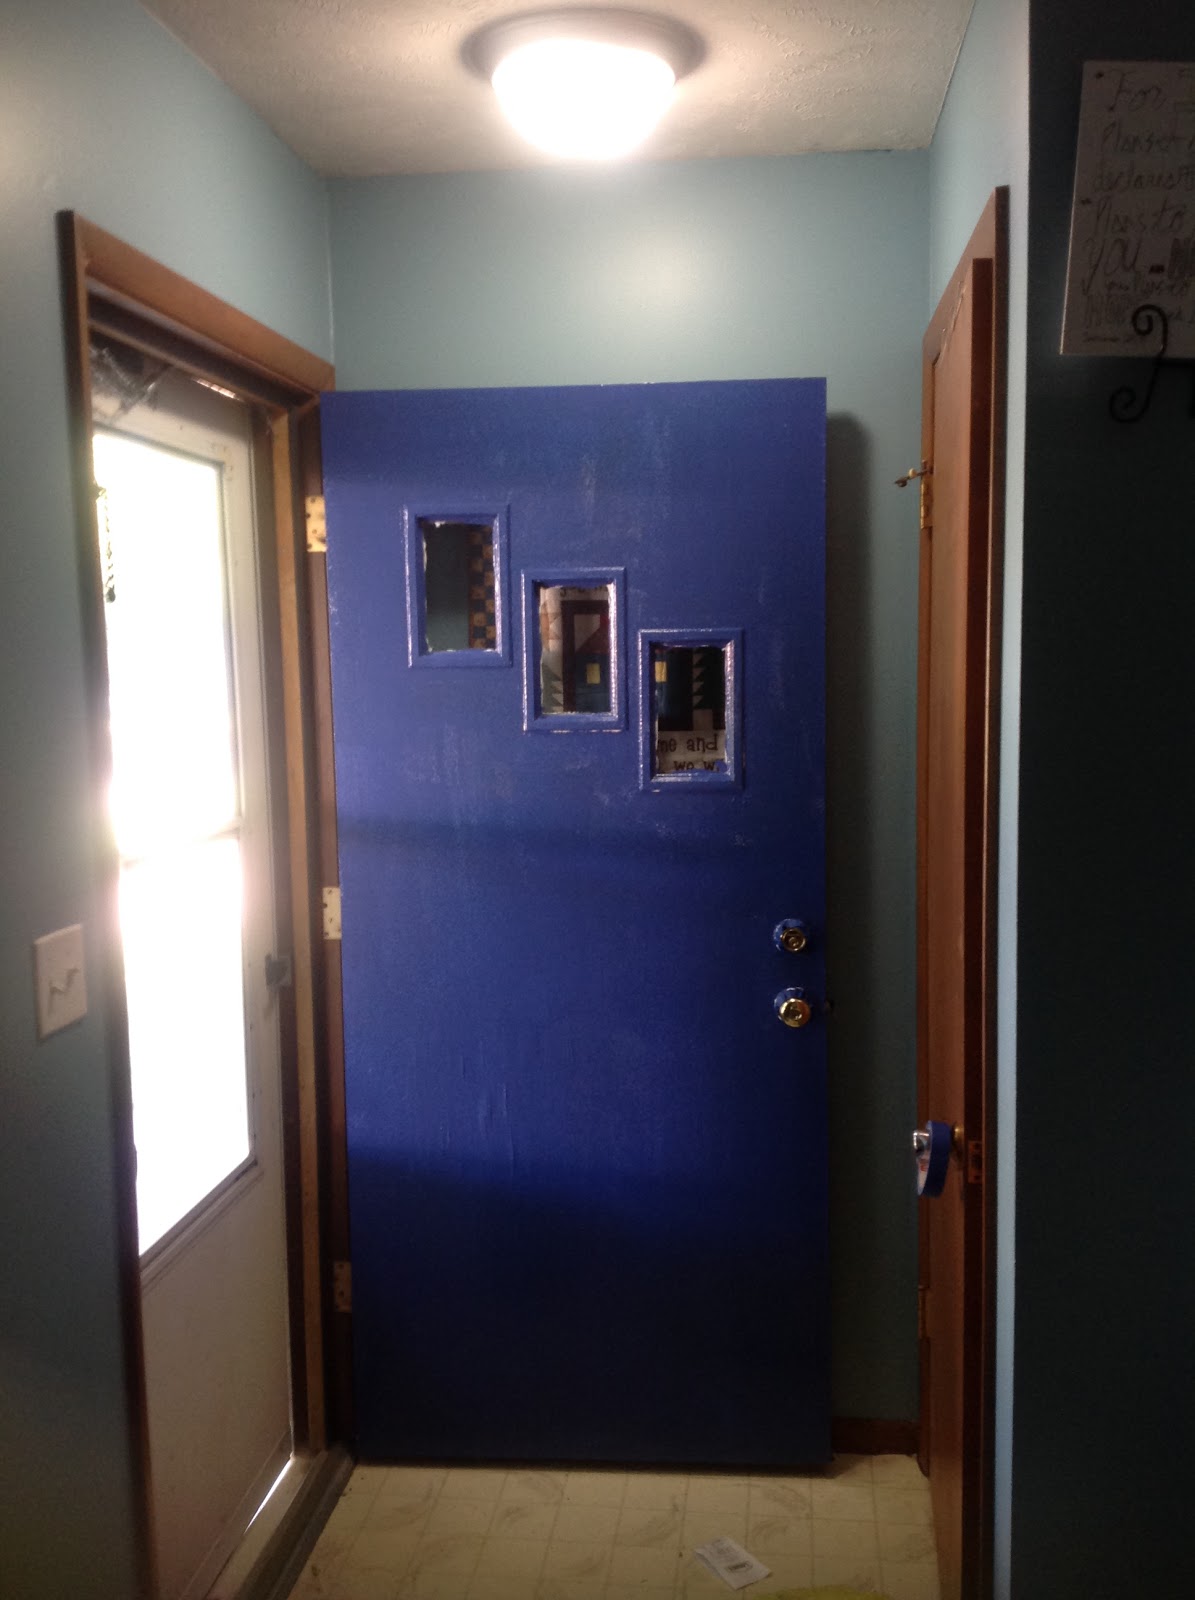
 So tired of this boring front door. We're trying out a new color before we commit to a new door.
 Apparently, the carpet liked the blue as well. Half a quart's worth. Exterior paint. Sigh.
 Fortunately, we were able to get a LOT of it up.

 We're still a work in progress, but I finally have a house number.

Tuesday, February 28, 2017

February Projects

It's been a bit of a slow month, but I did make this really cool hat.

Much of my other knitting time has been spent making blocks for prayer blankets that will be given to my friend Melody's three children. Each stitch is a prayer for those children left without a mother. Truly a labor of love.

Thursday, March 31, 2016

March Projects

I'm trying to finish one pair of socks every month this year. In March, I fished the Simple Skyp socks (from Ravelry) with the yarn my mom got me from the Bad Sheep yarn company in North Pole, Alaska.


I also managed to almost finish another pair, but they'll have to be done in April. This is the Vanilla Latte pattern (Ravelry) in Patons Kroy yarn. I can't wait to wear these with jeans...they'll be a great go-to pair.


Finally, another member of the Wilson clan has discovered the lure of yarn. According to Annie, "Knitting's my favorite!" Me too, sweet girl. Me, too.


Monday, August 31, 2015

Cinch Bag

I bought this fabric a year ago when Annie started dance class. Today, she blessed me with a good nap, allowing me time to pick up a long-neglected project.

I followed this tutorial:

http://www.momtastic.com/diy/106558-diy-how-to-make-a-drawstring-backpack/

I did line the bag (I had extra fabric, and since it was a basic cotton, I figured it couldn't hurt.) All in all, it took me less than an hour. And she's thrilled with her new ballet bag!


Tuesday, September 30, 2014

Finally Finished!

I'm so excited to have conquered my goal and knit my first pair of socks. I'm not sure where I went wrong when I tried five years ago, but I found that this was actually a lot more fun than I thought it would be. I'm forcing myself to finish a few other projects before I start a new pair, but I confess - I've been checking out patterns for a couple of weeks now!


Monday, December 31, 2012

Advent Calendar

We tried something new this year - my inner crafty side took hold with an idea I'd found almost a year ago. I made this nifty Advent calendar and filled each day with a slip of paper (instead of a toy or chocolate.) Each slip had an activity inside. (December 1 was "Make an Advent Calendar".)

Some of our ideas included:
  • Go to an Advent craft fair (the kind where you make, not buy)
  • Have an indoor snowball fight (think white socks)
  • Make a snowman, inside or out (since we had no snow that day, we settled for inside: mix 1 box of cornstarch with 1 can of shaving cream. Mix, mix, mix, get really messy, and store in an airtight bowl for about a week.)
  • Watch a Christmas movie
  • Read a Christmas story
  • Play a board game
  • Decorate cookies
  • Act out the Christmas Story
  • Make Christmas cards for servicemen & women
  • Go to Christmas services at church
It was a lot of fun filling our month with activities rather than "stuff".

To make the calendar:
  1. I bought 24 small paper mache boxes from a local craft store
  2. Painted the boxes with acrylic paint
  3. Picked 5 corresponding 12x12 (although you can go 8.5x11) scrapbook papers
  4. Cut papers slightly smaller than lids
  5. Place calendar stickers on the lids (scrapbooking section)
  6. Mod Podge papers to lids and let dry
  7. Glue gun a strong magnet to the back (I started with adhesive magnets, because that's what I had - not very successful.)
  8. Bought a jelly roll pan at Wal-Mart (the cheapest place I could find - you may also check Goodwill or other thrift shops.)
  9. Arrange boxes
  10. My pan didn't have holes in the handle, so Dan drilled some for me.
  11. Tie a colorful ribbon or scrap of paper
  12. Enjoy the Advent season

Tuesday, August 28, 2012

August Project #3 - The Menu Board

I love digital scrapbooking! I love cooking. And recently, I've rediscovered how much I enjoy having a plan so we're not scrambling at dinner time. I've found some ideas for menu boards I like, but nothing really jumped out at me. So...I made my own design.

I started with a scrap board from a local lumber store. I spray-painted it with Rustoleum's chalkboard paint. I also sacrificed 7 clothespins from my stash and spray-painted them red.

For the last 2 months, I've been tracking the meals we're eating and making a 3x5 card for each meal.

 Because I'm printing them on card stock, I'm not laminating them. The exception is my one blank card for "on the go" nights. I put a clear sheet of Contact paper over the top so we can write the name of a favorite location with a dry-erase marker. (No political commentary on our restaurant of choice this week, please.)

And every mom needs a night where Daddy can be the dinner hero and pick up a pizza or some Chinese take-out on the way home.
When Dan was growing up, he never knew what leftover night was. Because his brilliant mom always called it "International Family Buffet." Sounds fancy, doesn't it?

I'm liking this poppy scrapbook kit so much, I'm thinking about going with a red poppy theme when we finally get around to doing our kitchen.
 Years ago, Dan found me this sweet little piggy index card holder. It's been sitting empty waiting for just the right time. Well...sweet piggy...the time is now.
 Again, using my digital scrapbook program, I made recipe dividers and printed them on card stock. (Aren't those poppies fun?)
I'll keep adding cards to the box as we plan more meals. I'll also start penciling in the source for the recipe on the back, along with page number. We've also been keeping a binder of printouts of favorite recipes we find online.

Planning meals is getting to be a lot more fun!

August Project #2 - Can-a-pa-looza

Canning, canning, canning! It's been years since I've really done this. Usually the garden comes into its own about the time school starts. And who has time then? Well now, I do!

We didn't plant a garden this year, but I have been blessed by generous friends who keep giving me great vegetables.

Last week, I spent Monday playing with these gorgeous Romas:

 I've never canned tomato sauce before, and I wasn't quite sure what I was doing, but with the help of my trusty food mill, I was able to prepare and cook down 6 pints of tomato sauce.

 Aren't they pretty? I love the way cans look all shiny and nice, while they sit there and make their happy little "pop pop pop" sounds when you take them out of the water bath.

So on Tuesday, I wondered how I could top my Monday exploits. What's better than tomato sauce? 
 

That's right...SALSA! Just look at these gorgeous peppers, tomatoes, onion and cilantro! (Only the cilantro was purchased...the rest of the veggies were free!)

The house smelled absolutely heavenly while everything was cooking.

 
  Into the jars they went. "Pop pop pop" (Doesn't that just make you happy?)

I wonder if I can find some more tomatoes for pizza sauce now? Maybe some more cukes to make pickles?

August Project #1 - Wall Art

I know, I know...Pinterest can be a HUGE waste of time. But I'm getting some fun ideas as well. I've had this beautiful blue wall above our loveseat just begging to be dressed up a little bit. But with my new "stay at home" status, money is a bit tight for fun things like wall art. Then I discovered this site.

For about $15, I could make my own wall art. Well...everything was going swimmingly. I purchased the length of shelving and had them cut it down...except that a 1 foot by 10 foot piece of shelving really isn't 12 inches deep. It's like 11 1/2 inches. No worries...I just made sure they cut them square for me at Lowes.

Then to pick 9 pieces of scrapbook paper I liked. Except that there was a horrible shortage of beautiful papers in browns. So I bought a book of coordinated papers. All is well...would have been better on sale, but I was itching to get started.

I did have to trim my pages (because the boards weren't 12 inches square.) I trimmed them about 1/8" shorter because they stretched a bit with the homemade Mod Podge. (You can find that yourself on Pinterest...lots of good recipes out there.)

Now...the step that really threw me off was the part about using distressing ink on the edges. That was just a spectacular Pinterest fail. (Sorry...no pictures.)

So I bought ANOTHER book of coordinated scrapbook paper (Wal Mart, this time...quite a bit cheaper), scraped all the other papers off and started over. Without the distressing ink.

Before I glued them on the boards the second time, I laid everything out so I could decide which paper went where.


Once the glue was dry, my handy husband put hangers on the back. I marked my wall with a level and carpenter's square (I'm so proud of how well I can use tools!) And hung my finished blocks.


I'm pretty pleased with how they turned out.

Wednesday, June 20, 2012

Clothespins

We're sad the old clothespin holder doesn't work well anymore.

Our happy days together are just memories now.

So let's make a new one!

Dayna picked the fabrics. 1930's reproductions with little strawberries.

We start with a pleated skirt.

Add a waistband.

Make some shirt lapels. Doesn't it look like a cute little bowling shirt? Don't look too closely at those lapels...

Almost done, but those lapels are still bugging me.

Nothing some buttons and a ribbon can't camouflage.

Transferring the old clothespins. If only everyone had a cute little helper like this! She sure makes my life a ton easier. Love this girl!

Hanging out and ready to work.

Nothing like clothes on the line. And yes...that is a heavy fleece snowman pajama top that Dayna wore on a 95+ degree day after the swimming pool earlier this week.